

The problem
Most vaults require a PIN or a physical key to unlock. Both options are considerably weak for securing anything of value. If you’ve watched the Ocean’s trilogy or Mission Impossible, you’ll know that physical keys can be duplicated, locks can be picked and PINs can be brute-forced.
Let’s build a vault with Multi-Factor Authentication (MFA) and access mechanisms that can’t be forged or cloned.
Unlocking the solution
Having worked in tech most of my life, the solution was abundantly clear. This was a problem well suited for cryptography to solve, and more specifically, digital certificates. Cryptography is one of those things in life that takes a while to master, but once you uncover its power, you want to use it everywhere. This is one of those places.
Over the years, I’ve made a bunch of stuff work with digital certificates, but never anything that controlled things in the physical world. I just had to switch the digital output to a physical output, connect a solenoid to control a locking mechanism and we should have a fairly robust prototype vault.
Wait... what are digital certificates and solenoids?
A digital certificate is an electronic document that contains information about the identity of a person, organisation, or device. It acts as a form of digital identification, just like a passport or driver’s license. Certificates are used to verify the authenticity of digital transactions and to protect sensitive information such as passwords and credit card numbers.
Although certificates (and Public Key Cryptography) provide a secure and centrally managed means of authentication, they are susceptible to attacks on the private keys. If a private key is compromised, an attacker can impersonate the owner of the key, which can result in a security breach, or in our case, unauthorised access to the Vault, and we don’t want that! To mitigate this risk, we’ll use smartcards (I’m a big fan of Yubikeys) in conjunction with certificate authentication.
By combining certificate authentication with smartcards, the private key is protected against theft or duplication. Note: keys must be generated directly on the smartcard to take advantage of this.
Lastly, a solenoid is an electromechanical device that converts electrical energy into mechanical energy. It consists of a coil of wire that is wound around a ferromagnetic core. When an electric current is passed through the coil, it creates a magnetic field that pulls a plunger inside the solenoid. This will be used as part of our locking mechanism.
Let's get building
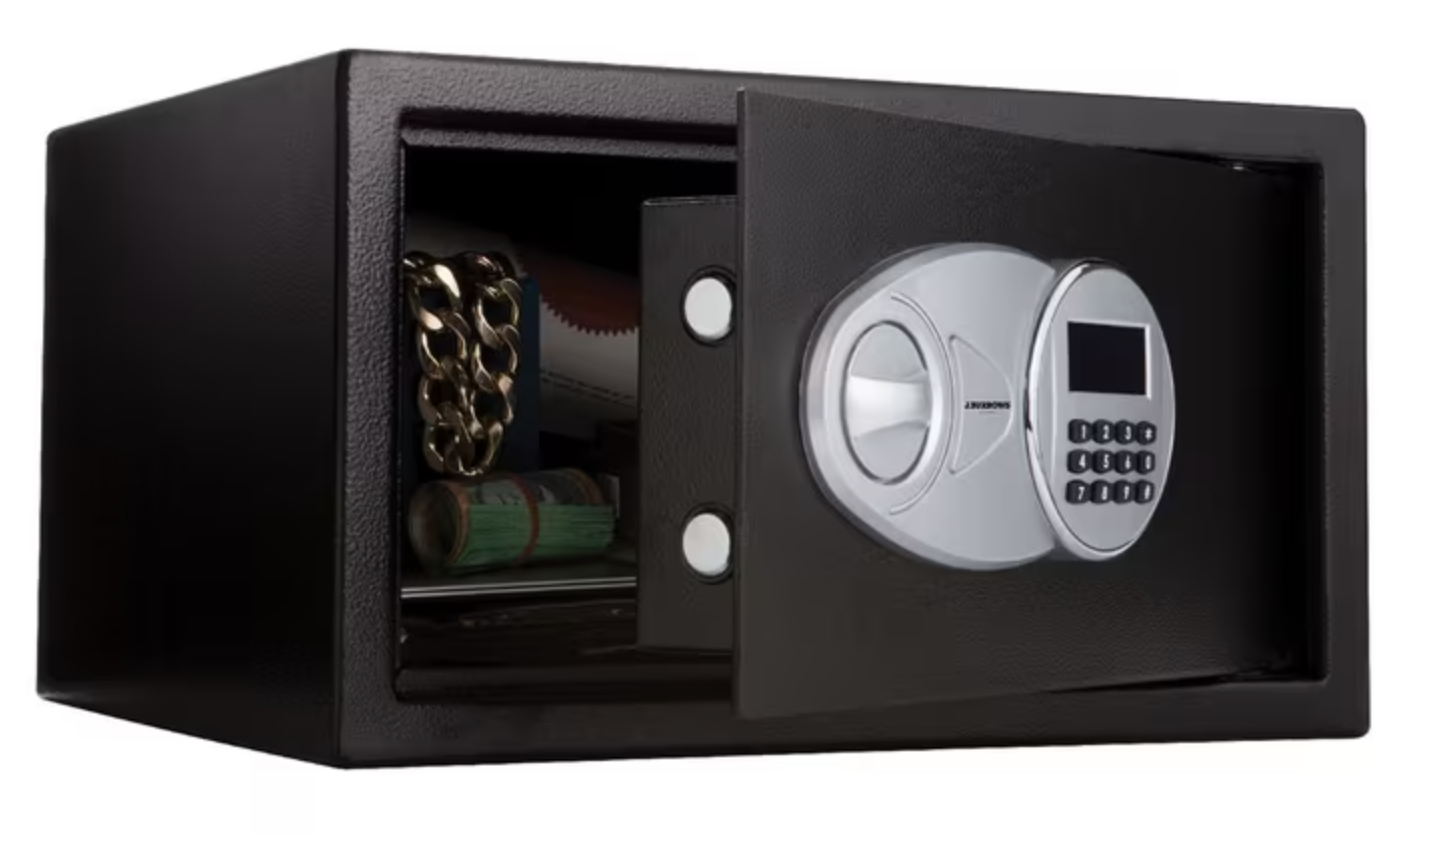
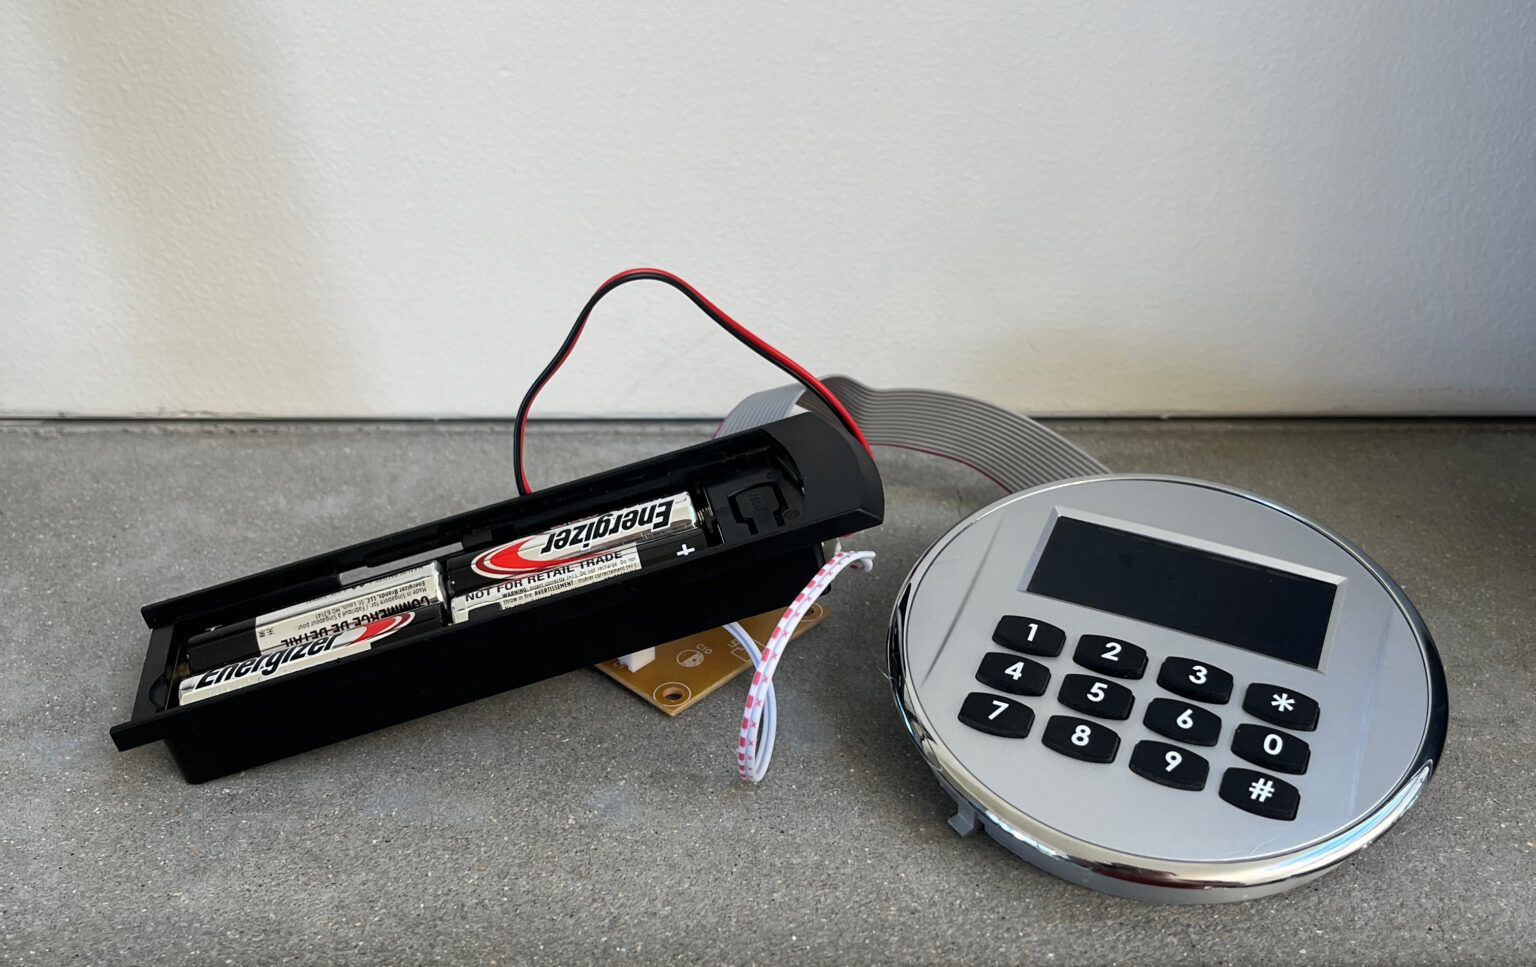
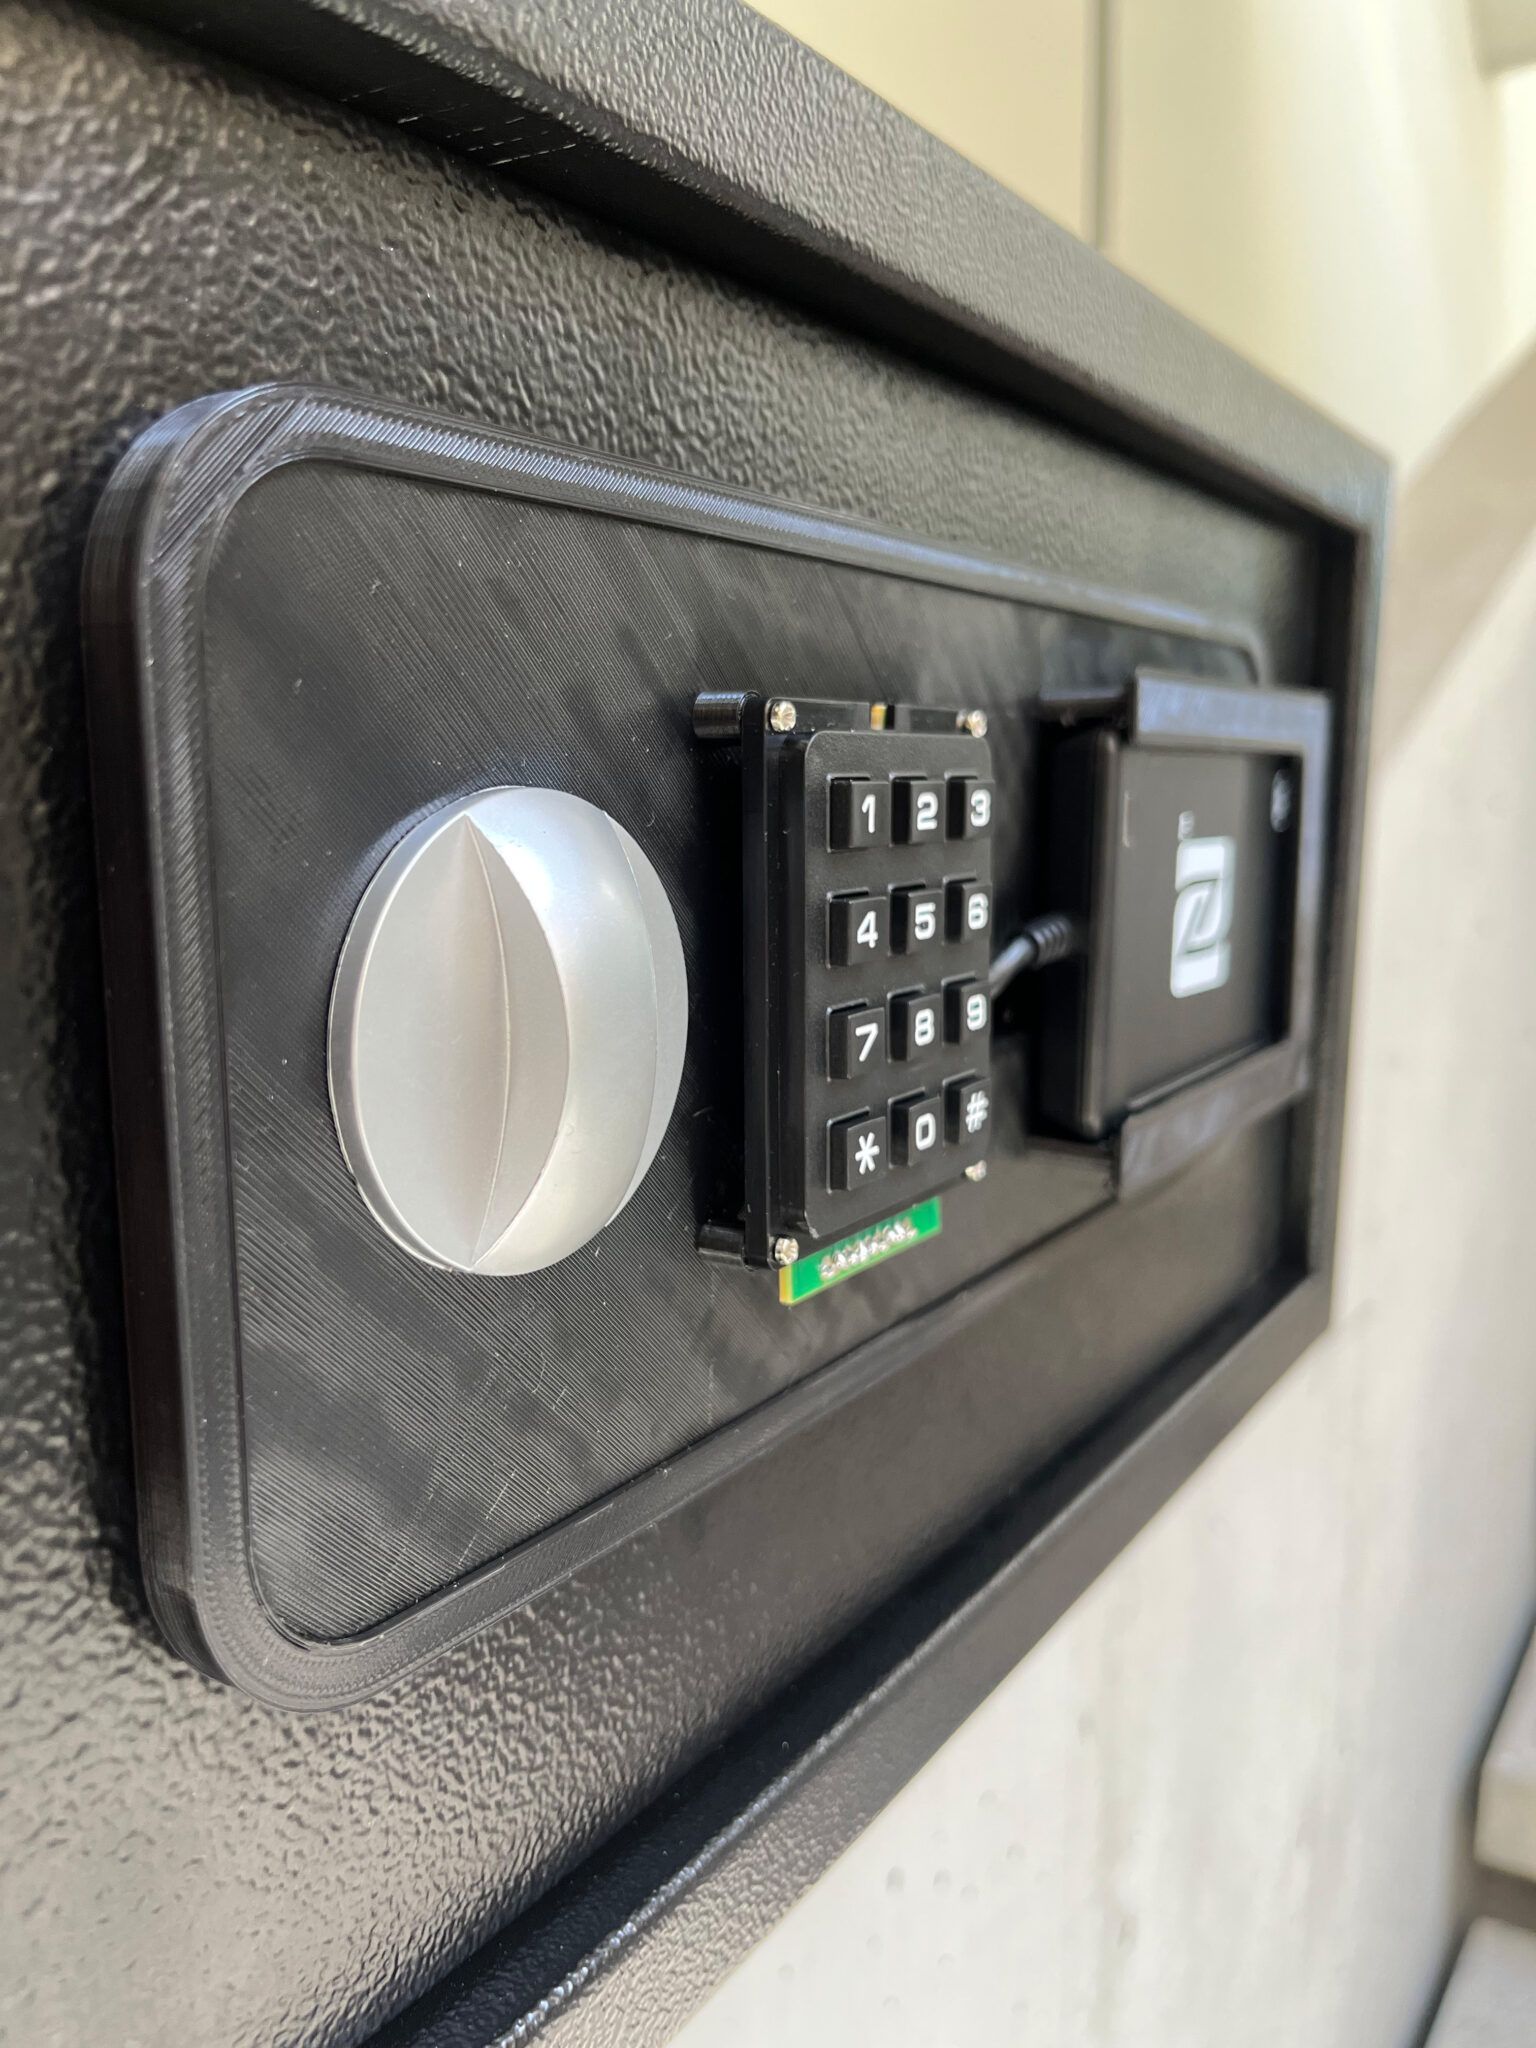
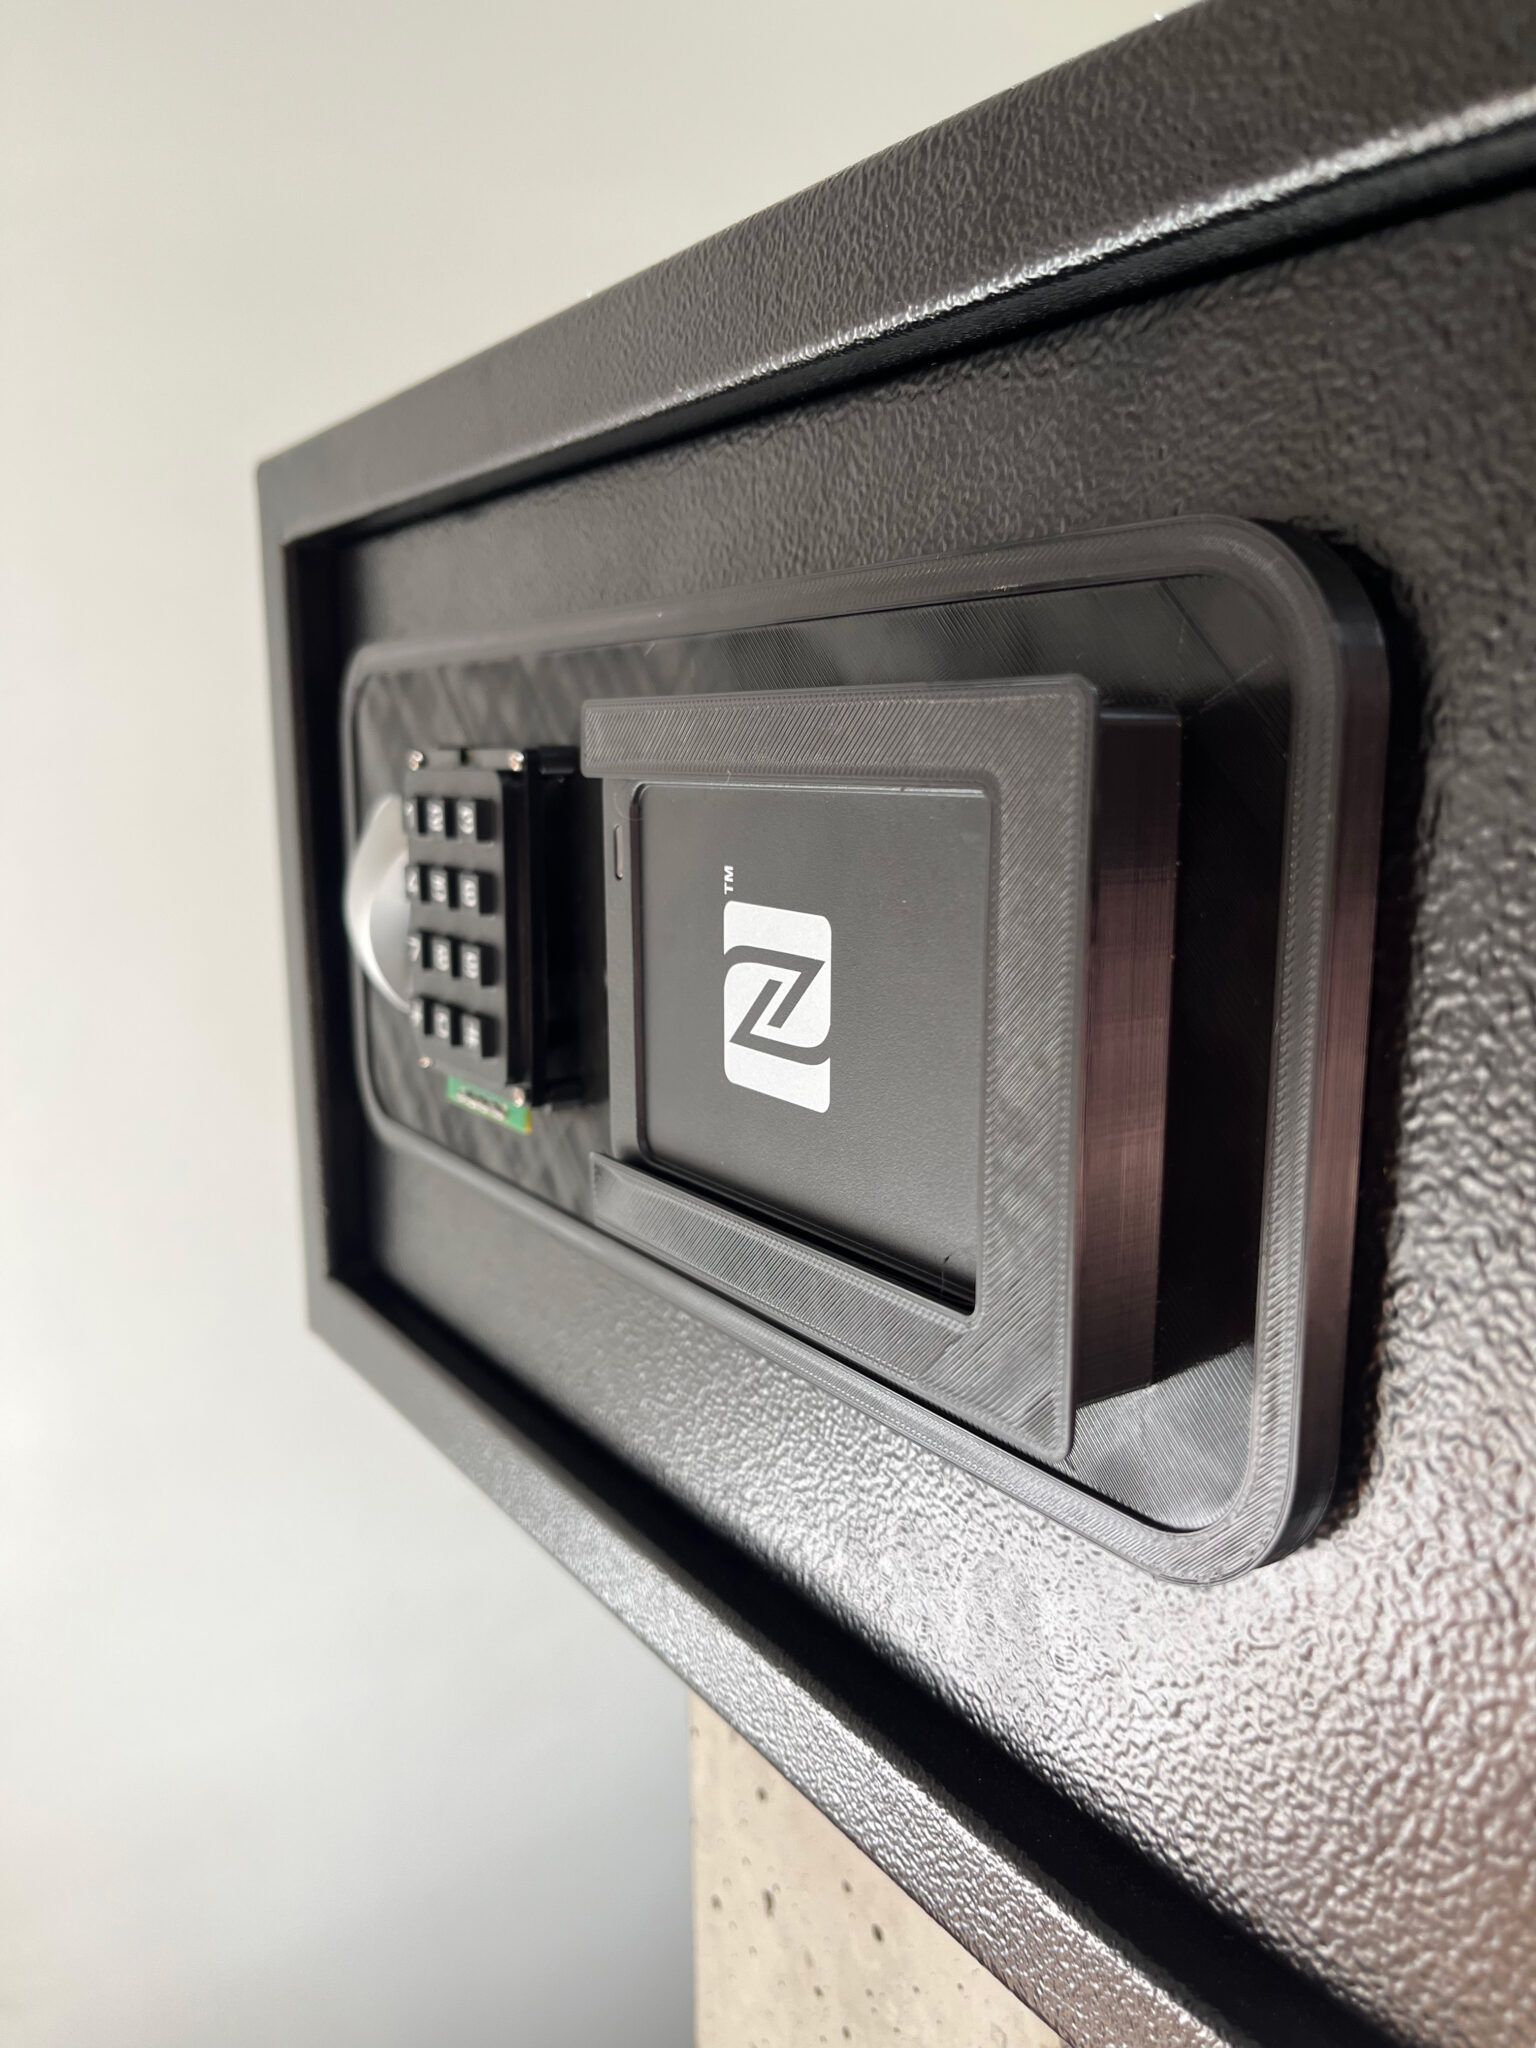
For the prototype, I settled on an in-expensive vault from Officeworks. After dismantling the original PIN pad and faceplate, I was left with an empty shell I could use to retrofit my own parts.
The software
The Vault was written in Python and runs as a systemd service. At a high-level, the Vault performs the following functions to make an access determination.
- accept a 6-digit PIN from the keypad (we’ll need this later for cryptographic operations)
- generate a temporary challenge file with 32 bytes of random data
- calculate the hash of the challenge file and temporarily store the result
- extract and temporarily store the certificate from slot 9a (PIV Authentication) on the smartcard
- sign the challenge hash from step 3 using the private key on the smartcard. This is where the PIN from step 1 is passed in to complete the PKCS#15 operation. The resulting signature is temporarily stored
- verify the extracted certificate from step 4 against the root certificate stored on the microprocessor
- extract the public key from the certificate and temporarily store
- Re-calculate the hash of the original challenge file from step 2. Verify the digital signature created in step 6 using the public key.
openssl dgst -sha256 -verify {public_key} -signature {signature} {challenge_file}- extract the subject distinguished name from the certificate so we know who’s gaining access.
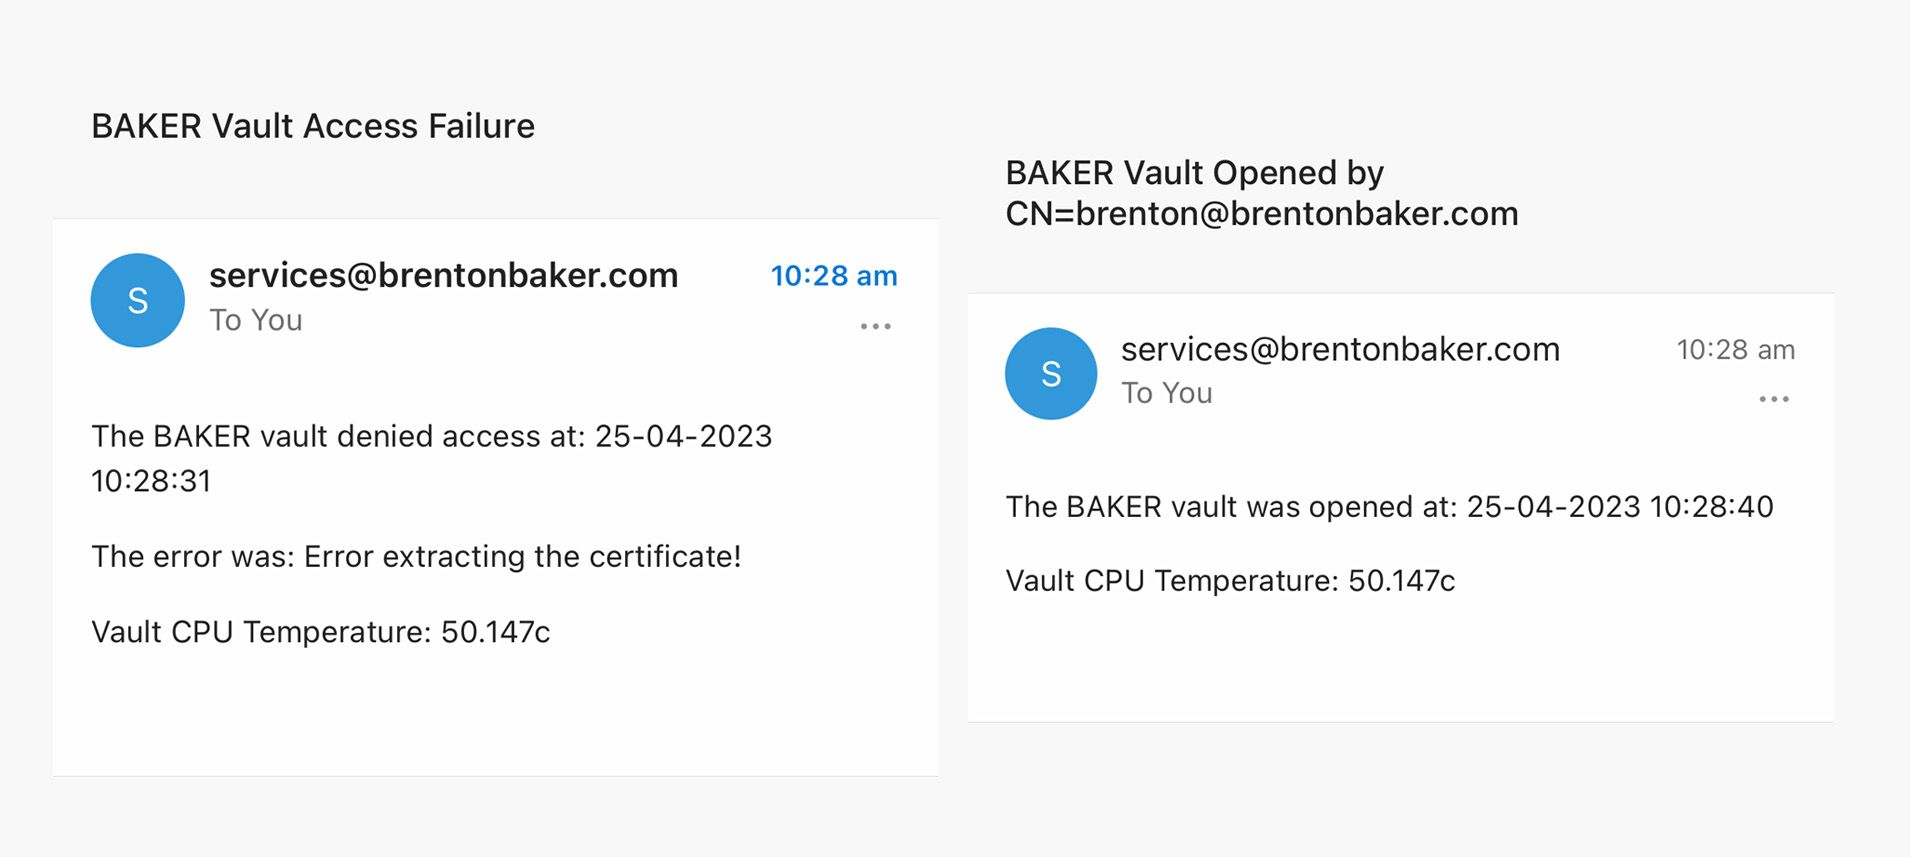
- verify the subject distinguished name and card serial number against a whitelist. If both are valid, activate the solenoid to open the Vault door
- release the solenoid after three seconds to lock the Vault door
- purge all temporary files
What about certificate revocation?
First, let’s define what revocation is. Revocation is the process of invalidating previously issued digital certificates before their scheduled expiration date.
This is useful for situations where certificates become compromised, stolen, or used fraudulently. As I mentioned earlier, the risk of private keys being compromised is mitigated as keys are generated directly on the smartcard. However, we need to account for situations where the physical smartcards may be lost or stolen.
To address these issues, some Certificate Authorities (CAs) revoke the digital certificate and add the certificate to a publicly accessible Certificate Revocation List (CRL) or use the Online Certificate Status Protocol (OCSP) to inform people that the certificate is no longer valid. This would be suitable for devices with internet access, but our Vault still needs to operate without internet or network connectivity. In addition, my private intermediate CA is configured for passive revocation, whereby there is no CRL per se. Instead, certificates are designed to have a much shorter life (usually no more than 24 hours) and are issued more frequently.
This is not ideal for our use case; I don’t want to be minting new certificates every 24 hours. To solve this problem, I’ve issued longer term certificates and added verification logic to check the card serial number and subject name on the certificate against an array of accepted entities, effectively creating a user/card whitelist. If a card is lost or stolen, the serial number and certificate will be removed from the whitelist.
Bringing it all together
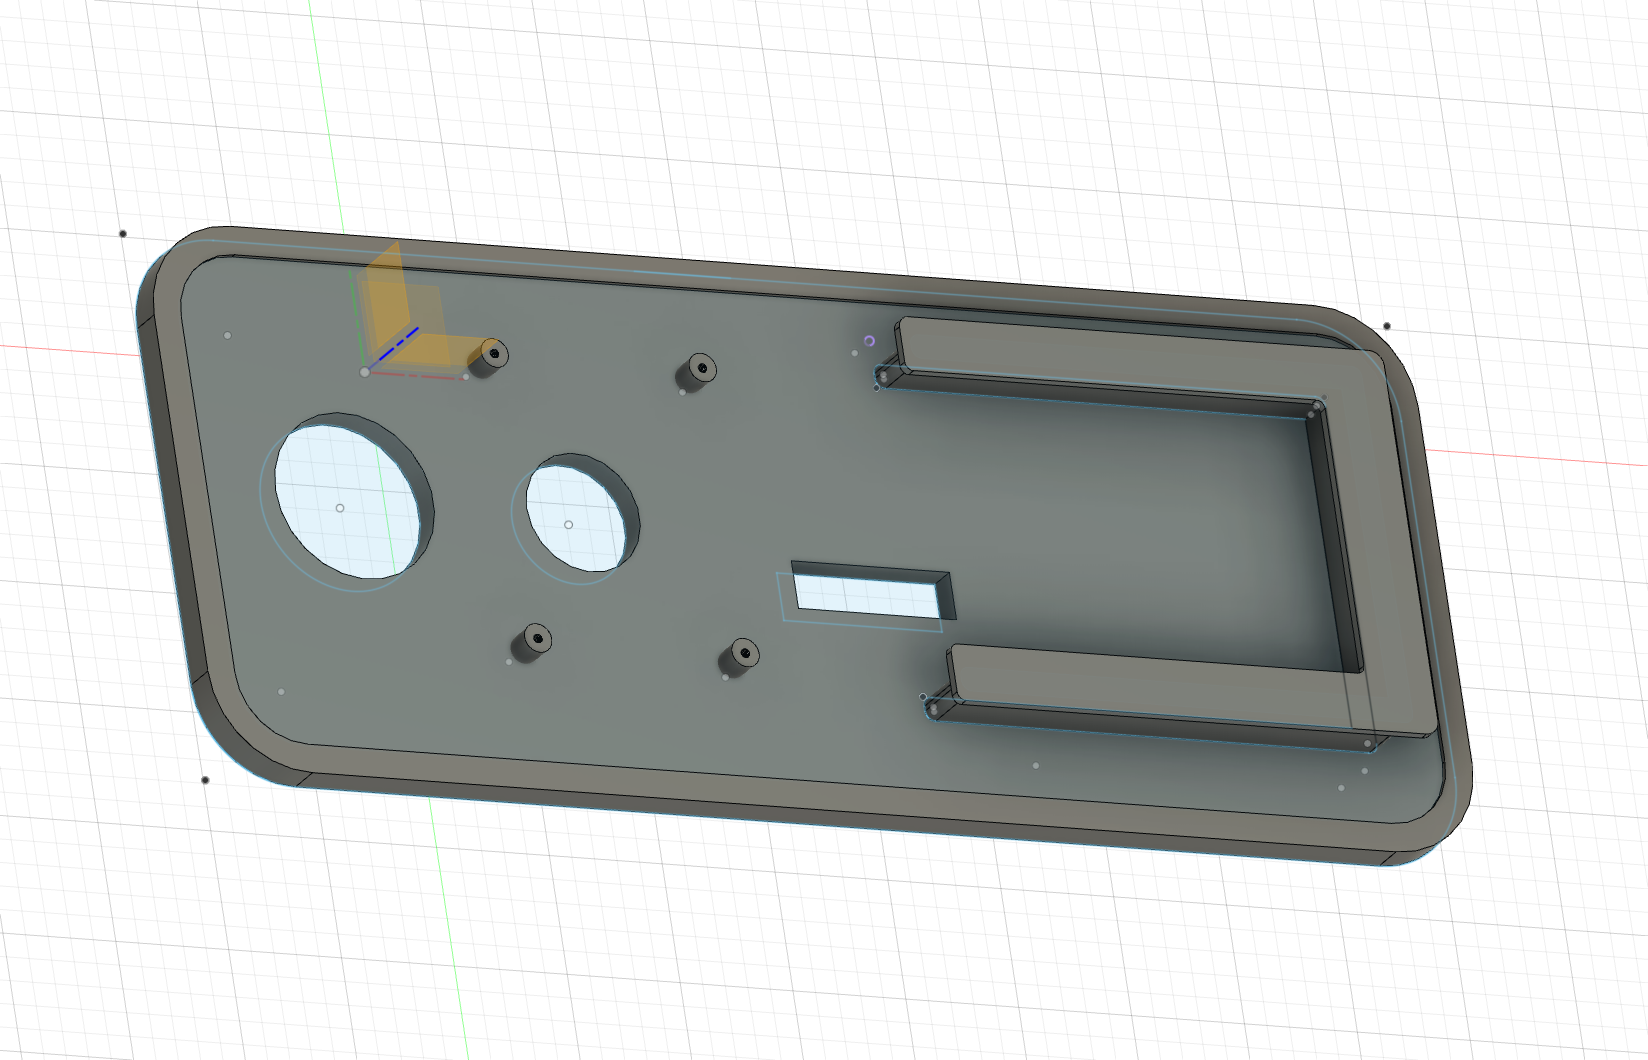
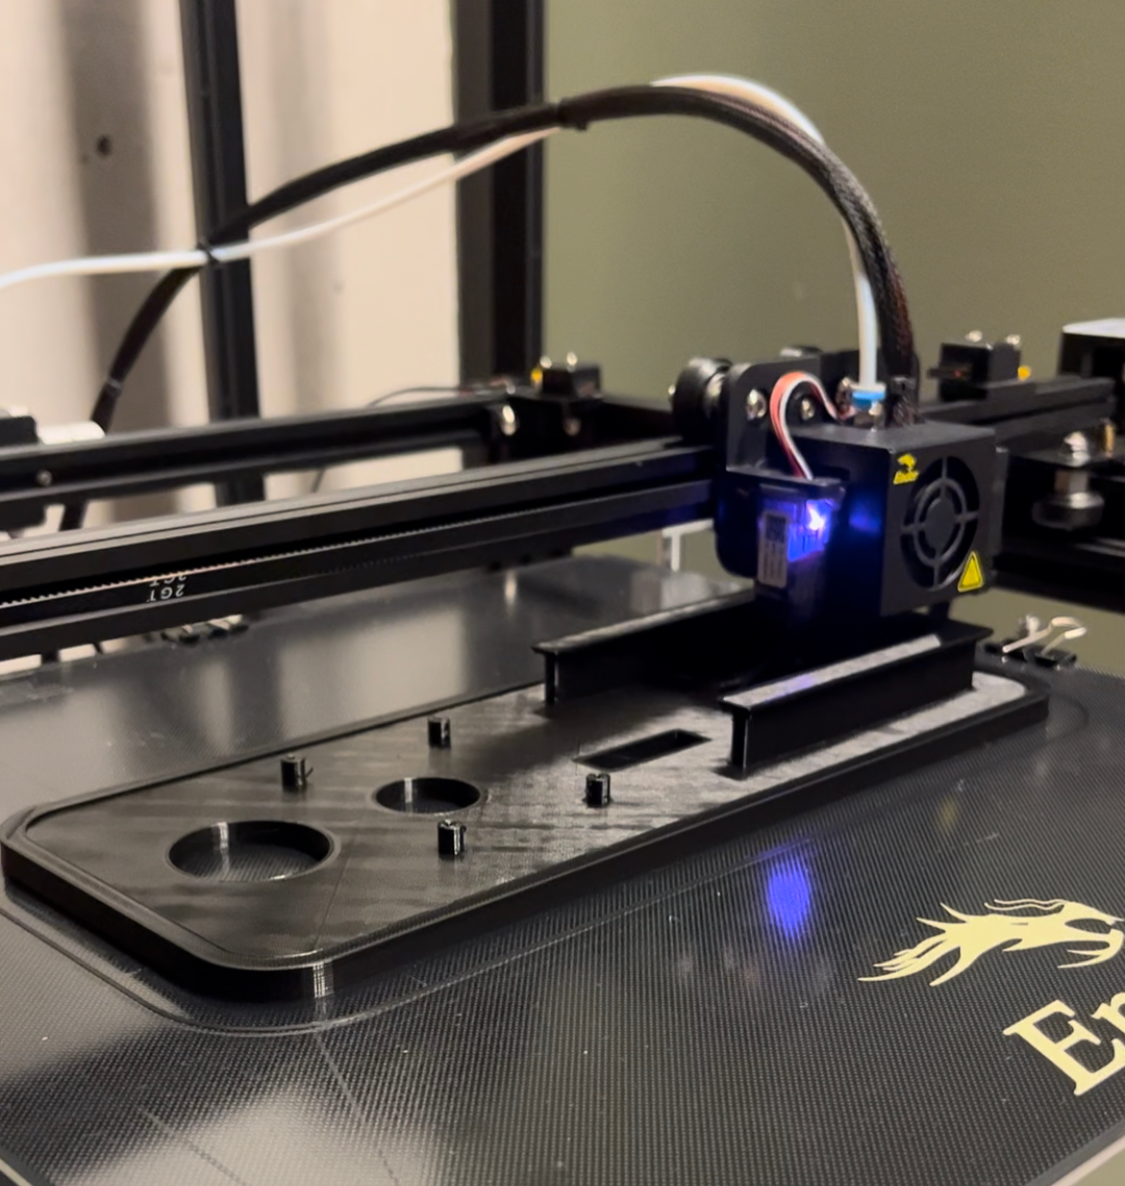
With a donor vault body and working software and hardware, it’s now time to create a plastic faceplate that will house our new PIN pad and NFC smartcard reader.
Using CAD and the power of 3D printing, I created a custom faceplate and mounted it to the Vault.
We’ll also use a handy SendGrid Python library to enable email notifications when the Vault grants or denies access.
Powering up
Check out the video below to see the Vault in action.